Center Panel

Friday, March 3, 2023

Final Assignment for Altenew Academy Level 2

 My final assignment for level two of the Altenew Academy was to make four men’s cards and an altered project. I decided to make a card box as the altered art project. The assignment called for specific topics for the cards, but since I will be the one using them I wanted to keep them generic so I could use them for occassions that might arise in the future. Any one of these cards could easily be adapted for any occassion. 

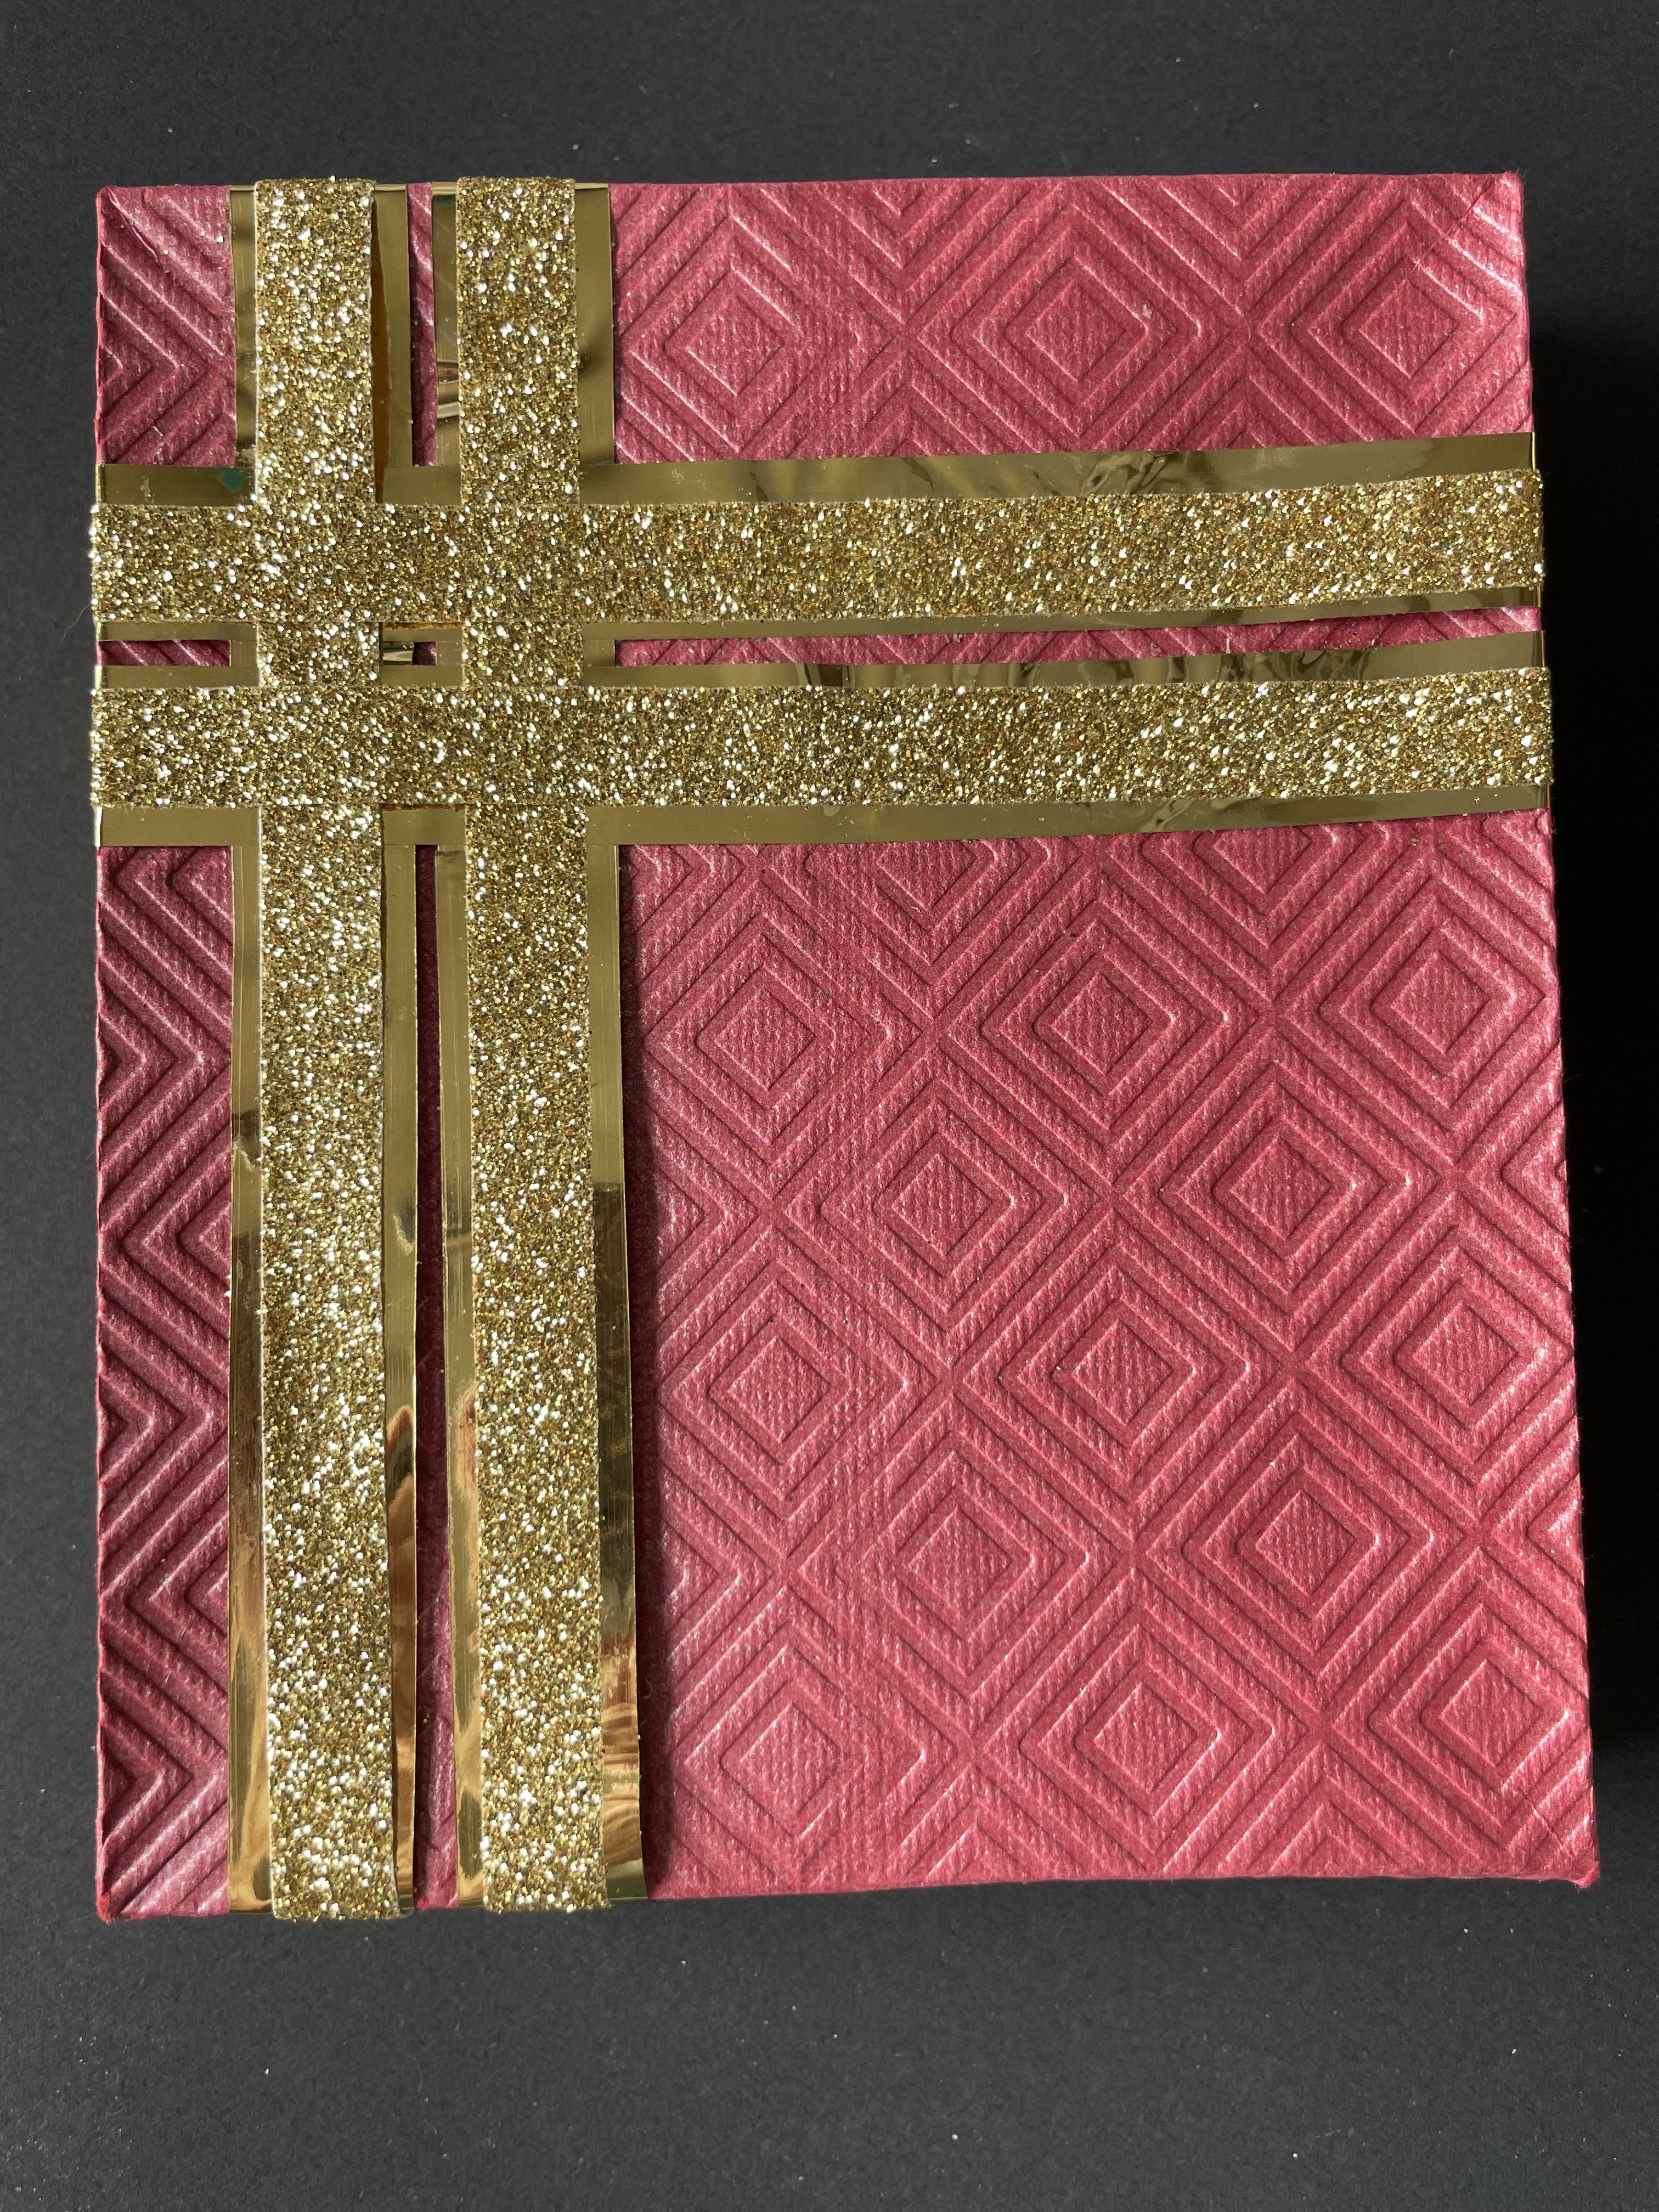
For this I cut the box using my Cricut Maker. I then embossed the box lid using the  Altenew Shine embossing plate. To keep the project masculine, but also add interest, I used both shiny and glittered gold ribbon to add a geometric design to the lid.


For the first card I, again, used the geometric embossing plate for the front. I then added a black panel and heat embossed the SHINE LIKE THE STAR YOU ARE sentiment to the center.

Below is the embosing plate I used for the card box and the first card as it makes it so much easier to pass the sandwich through the embossing machine.


The second card was inspired by a birthday card I received from a friend. I was so excited to recreate using altenew products. I quickly ordered one of the Altenew Plaid Cover Dies ( I can't wait to get the other one). Before adding the die cut to the A2 card base, Using the large flower stamp from the Altenew Fragrant Flowers Stamp and Die set  I inked it using a light gray from the Altenew Crisp Die Ink mini cube set  to serve as a background under the Altenew Plaid Die cut. The plaid die cut in medium gray card stock was then adhered to the front of the card. I next placed a diagonal piece of the same gray card stock used to cut the plaid die to the right side of the card. The Wonderful wishes sentiment was stamped and hand cut and then placed at the top center of the card. Lastly I stamped and cut an outline die cut of a flower and leaves stamp from the Altenew Beautiful Day stamp and die set to the lower part of the card.


I am so grateful to a fellow crafter who encouraged me to buy the Altenew leaf collection and thought it made a wonderful addition to the men's card set. In hindsight I would have preferred to have the two side leaves angled and closer to the center leaf. Having said that I still love this card and am happy to include it in the set!


Last, but not least, is the HUGS card. I LOVED using the Altenew Slim Line large stamp which was used to make the squares placed diagonally onto the card front and then overlapped with the Altenew Fancy Hugs Die. When my card class made this card some of them added a rectangle of red card stock behind the design and I thought that was a wonderful addition to the card. (Wish I had thought of it!).


Photocentric Clear Stamps Pinstripe Stamp Set


Photocentric Clear Stamps Pinstripe Stamp Set


Thursday, February 23, 2023

February Card Class Video


I planned this class to be ,what I thought was, my final Altenew project. I was not correct,but still
like the video enough to keep it posted. I hope you enjoy watching it as much as we enjoyed 
making our monthly 3 cards plus 1!


Thursday, January 12, 2023

Altenew Academy Level 2 Polychromatic Lesson 5


                                       I just loved working on this card! 


Using the same Beautiful Day Altenew Stamp set I stamped the
                   leaf clusters and and flowers. 


I used a cover die  for the bottom layer 
and then placed the die cut flowers and leaves and added clear
and colored dots for added interest. 


Last I heat embossed a gold sentiment


Saturday, October 22, 2022

Altenew Academy Level 2: WITH A TWIST


I was so excited to make this card 
as I had all of the same stamps and dies as the demonstration card 
The one exception was the sentiment. Although the words were the same
as the presentation card, my stamp used a different font. However, it is an
Altenew stamp.


The first step was to stamp the leaves. I used Forrest Glade and Frayed Leaf
                                                                                                                             
from the Altenew Green Fields Mini Cube set to stamp the leaves in a

random pattern


I next cut a triangular shape from the front of
the top folded A2 card 


I then stamped two of the butterflies from
the Painted Butterfly stamp set using
Jet black for the outline and Moon 
Rock and Evening Gray for the wings.

And then cut them out using the 
coordinating dies


I then adhered a moss green layer to the inside of the card


I used the butterfly stamps to help 
me decide on placement and then
adhered the die cuts to the card front using
glue dots


I was so excited to find that I had the same
sentiment used in the demonstration card
and stamped it on clear acetate rather than
taking a chance on stamping directly to the 
card. It was adhered using clear scor tape 
and lastly embellished with clear drops colored
using a light green copic marker.


Sunday, October 16, 2022

ALTENEW ACADEMY LEVEL TWO: Magical Marker Techniques


 The technique used for this card is one that I expect to use often. Watching the class presentation I expected to have difficulty achieving my goal. However, the instructions and visuals made the technique easy to understand and replicate. I chose the Altenew Frosted Garden set as it provided a nice variety of stamp sizes and shapes.


I stamped and colored several of each of the stamps I wanted to use and colored them using Deep Iris and Midnight Violet Aletenew Crisp Dye Inks.


I cut the stamped images in preparation for die cutting them. After die cutting I tried several arrangements to find the best fit and mix of colors. I chose a dark purple layer cut just under 51/2 by 
4 3/4 so there would be a narrow frame around the layer.

I tried several arrangement and when I was pleased with them glued them into place. Making sure not to cover the sentiment which was embossed using Rose Gold Embossing Powder.


The next step was to turn the card over and cut off the overhaning embellishments. And the last step was to adhere the embellished layer to the card front. I chose a beige card base to reinforce the impact of the gold embossed sentiment.


Thursday, October 13, 2022

Altenew Academy Level 2: Masking


While viewing the lessons for this class I knew I would welcome the
opportunity to use one of my favorite Altenew stamp sets. That being
the ADORE YOU set. 

I began by cutting a mask for the large flower from Mint Masking Tape


I then stamped the outline stamp of the large flower using Ranger Black Archival Ink 
to prevent bleeding from the watercoloring I planned to do.

                                                   
                                           After stamping the large flower I masked it off and      
                                            aligned the two side facing flower stamps and 
                                                stamped them, again using archival ink


                                                       Next I was excited to have an opportunity to use
                                                        the new Ranger watercolor crayons (set one)
                                                                       to color the flower images.


                                                      I practiced with several color combinations
                                                       until I was satisfied with the results I was 
                                                       looking for. I also added shading on the
                                                         yellow flowers to emphasize the curves
                                                                            in the petals. 

                                                             Next I, again, used mint tape to mask off
                                                          all three flower images and used a water brush 
                                                        with Ranger cracked pistachio Distress Oxide
                                                         to make a backdrop for the flowers.


                                                          I then uses a shaped die to cut the design.


I layered a matching colored mat onto
an A2 card base and adhered the flower
embellishment to the front of the card and 
added the Adory You "Thank You" stamp.


Below are out takes from all the frustrating mistakes made during the making of this card


Friday, July 22, 2022

Altenew Academy Level 2: In The Mood For Color


                         SYMPATHY

The mood that I chose to represent is "sympathy". I used Yellow for the main color even though yellow
is thought to represent, energy, cheer, and optimism.

When I was in grade school my mother told me of having watched a movie about someone who had died and a loved one visiting her grave noticed yellow butterflies flitting around the gravesite. I don't remember how the person knew that the butterflies were there for the loved one, but they did.

This story seemed so important to my mother that I wrote a little song for her. (VERY LITTLE)
                                      " Pretty yellow butterfly
                                         Sing to me a lullaby
                                        Pretty yellow butterfly
                                         Come along with me"


This memory is so special to me and, although it is about death, it is also about love and hope. And a special memory between me and my mother, who always loved my sister best! (if you are old enough to remember this notion from the Smother's Brothers show)
 
I was excited to use my Altenew "Painted Butterflies" stamp set as it is one of my favorites. To color them I used the yellows from the Golden Sunset and Pocket Full of Sunshine Crisp Dye Ink Cube sets.
And embellished with gold jewel dots


After stamping I mounted the white layer onto a matching yellow layer 
and then adhered to a black card base


Thinking I was done I then realized a little bling might be a good touch
and added some gold beads as seen in the top. photo.